Today I printed of all of my edits of my best photodynamism images and asked my peers to select their favourites. I am also in the process of asking my tutors to do the same. Tonight I have uploaded albums of the images onto different Facebook groups as well as my own profile to get the public's opinion.
The groups:
https://www.facebook.com/groups/111473958877277/
https://www.facebook.com/groups/35517615269/
https://www.facebook.com/groups/6664259034/
Wednesday, 22 May 2013
Tuesday, 21 May 2013
Exhibition Tutor Discussion
Today I met with my tutor Kellie to discuss my plans for my exhibition space and how it could be developed and put into action. My original idea for my exhibition space was a very basic layout.
We came to the conclusion of measuring up images to fit on my 8ft X 4ft boards for my edited Photodynamism pieces and then to create an interactive plinth for the best of my photograms.
We also discussed what would happen in my final workshop. My current idea is to scan in and transfer my best images on photographic paper onto acetate and then, using an overhead projector, project different arrangements of these images onto the wall, covered by large pieces of paper, and allow the public to recreate the arrangements of images. There is likely to be 2 combinations of 3 images on the wall so the public has a choice of which they would prefer to be part of.
We looked over the pieces that had been created from my practice workshops and this handprint stood out.

We decided that to lead the public to my workshop, I would have stickers of this handprint going from my exhibition space to my workshop. Kellie and I spoke about using Adobe Photoshop to put a single word into each handprint from the list of words used in my second workshop. We also discussed cropping the handprint into more unusual shapes, and creating more handprints such as a hand pointing in a certain direction. The following images cropped from this handprint.
.jpg)
.jpg)
.jpg)
.jpg)
.jpg)
.jpg)
Silk Screen Printing Photograms
Today I silk screened printed the photogram voted best by my peers.

To begin with I printed off the image to A3 after increasing the contrast.


I then covered my screen in light-blocking emulsion, waited for it to dry, exposed the image on my screen and cleaned the screen of the emulsion so the image came through. I chose to use acrylic paint with an emulsion mixer so my prints would dry quicker and the screen would be easier to clean.

My prints came out well, however the prints had lost some of the detail from the original photogram due to the high contrast. Because of this I won't be taking this technique any further in my project.

Photodynamism Editing II
From the editing I did last night, I went on to accidentally crop an image, resulting in the next stage of my digital editing.
From there I went on to crop out the bottom of some of my edited pieces. I also darkened the background with the Healing Tool on Adobe Photoshop. This was much more effective on my simple photographs with not too much going on.


At seeing these images Anita, the model in the white top, asked me to invert the images to see what they would look like.Vicky (my tutor) and Alan (Art Technician) stopped to take a closer took at the images and mentioned how interesting they look. Alan asked me how I had created the images and I explained to him step by step from the studio to Photoshop.


 |
| Original |
 |
| Cropped |
From there I went on to crop out the bottom of some of my edited pieces. I also darkened the background with the Healing Tool on Adobe Photoshop. This was much more effective on my simple photographs with not too much going on.
At seeing these images Anita, the model in the white top, asked me to invert the images to see what they would look like.Vicky (my tutor) and Alan (Art Technician) stopped to take a closer took at the images and mentioned how interesting they look. Alan asked me how I had created the images and I explained to him step by step from the studio to Photoshop.
Address the issue I mentioned at the end of my last blog entry, I decided to join both the positive and inverted images together.
Monday, 20 May 2013
Photodynamism Shoot and Editing
Today at 4pm I went to the college's studio to set up a photoshoot that would give me similar results to Bragaglia's futuristic photodynamism images. I had two film lights set up, along with a black background. I requested fluid, somewhat abstract, movement from the models, as if they were moving throughout a large crowd. I used my E0S Canon SLR.


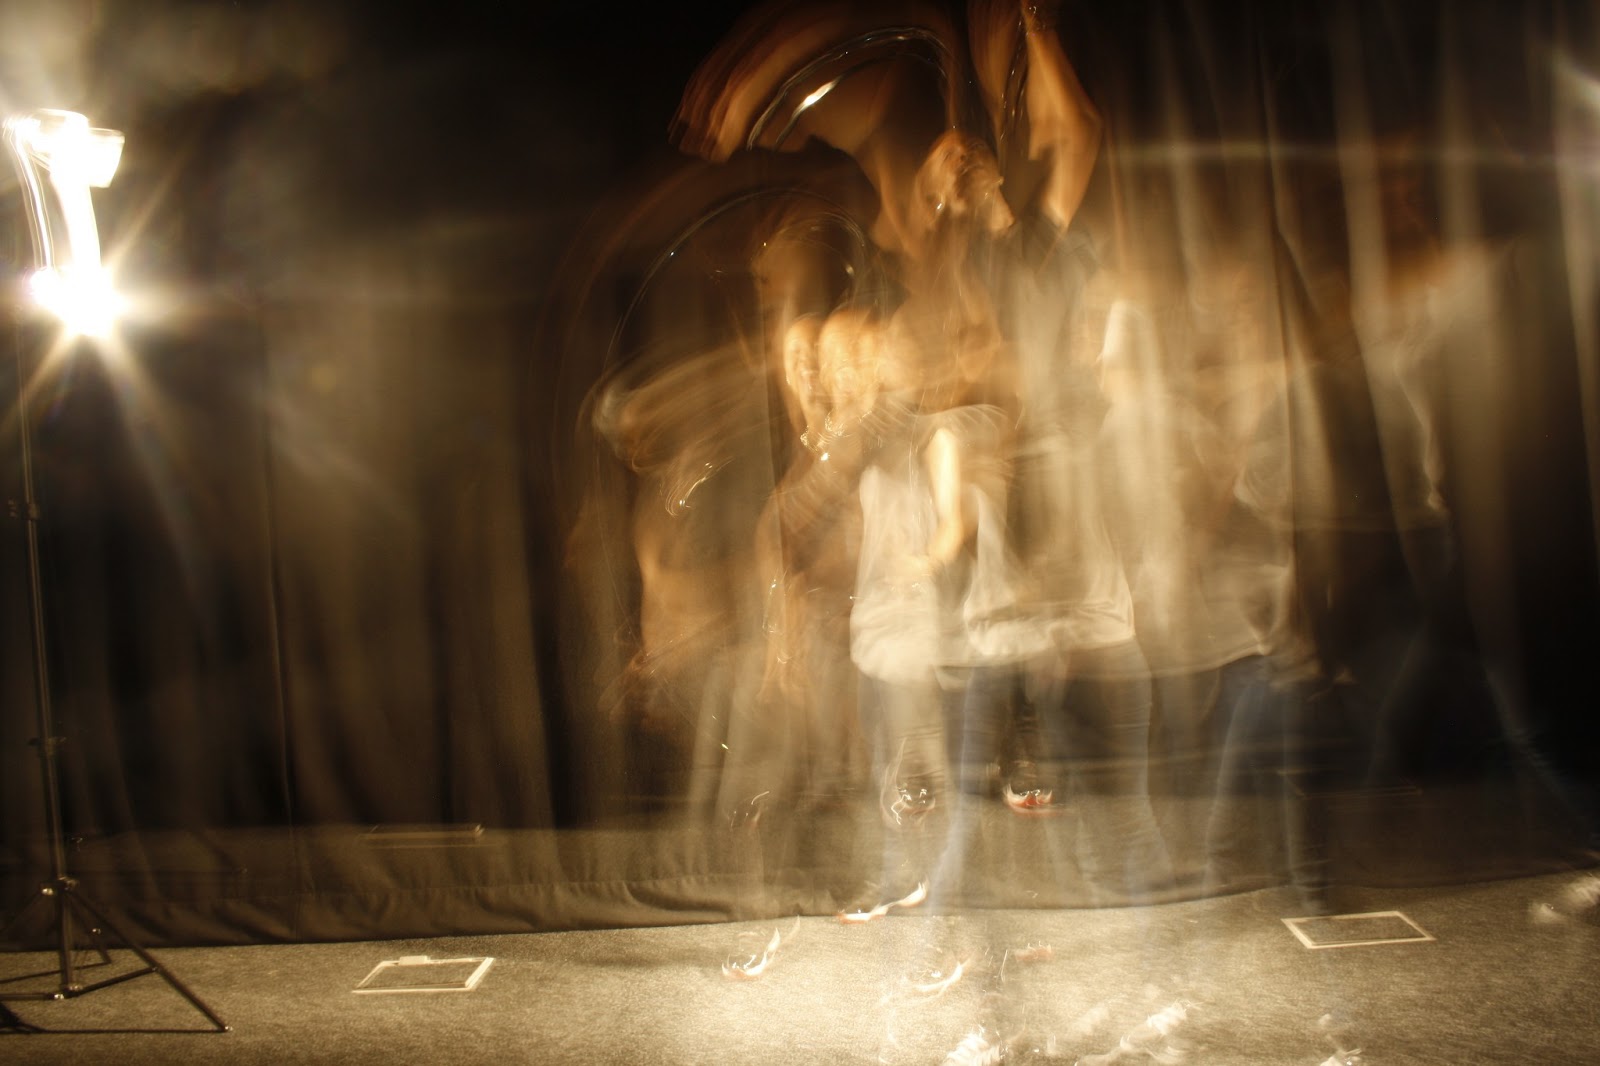


From this point I need to work out how to edit the carpet without destroying the figures.
Here are a few of my favourite shots.
The photographs weren't as perfect as I would have liked them to be so in Adobe Photoshop I increased the contrast and lowered the brightness.
Friday, 17 May 2013
Practice Workshop II
My second practice workshop was originally intended to be silk screen printing, however I had to change this to mono-printing due to a lack of screens. A few days before the workshop Kellie told me that the media students would be getting involved with it and so I sent her a lesson plan to forward onto the media department.
The idea for the workshop was to split the group into two (2 groups of 4 participants), allowing one to have freedom of colours, materials, etc and the other group (the control group) would be given very strict specification, such as blank white paper and black ink. As I am focusing on loss of identity, I chose to give each group a list of words which link to conformity, as you lose your identity when you conform to others. Each group must incorporate all of the words in their mono-prints, however each design must link together with the rest of their group. This way both groups must conform to the words they are given and the links their work must adhere to, no longer allowing their work to be individual, but part of a collective.


Vicky and I spoke about my third practice workshop incorporating my photography, in which I would develop my negatives to A4, scan them in and then print them onto acetate. These would then be available to the participants to layer onto of one another in any order on an over-head projector. Each participant would be given one colour and one drawing style to use to recreate the image they had created from the acetate prints.
The idea for the workshop was to split the group into two (2 groups of 4 participants), allowing one to have freedom of colours, materials, etc and the other group (the control group) would be given very strict specification, such as blank white paper and black ink. As I am focusing on loss of identity, I chose to give each group a list of words which link to conformity, as you lose your identity when you conform to others. Each group must incorporate all of the words in their mono-prints, however each design must link together with the rest of their group. This way both groups must conform to the words they are given and the links their work must adhere to, no longer allowing their work to be individual, but part of a collective.
Vicky and I spoke about my third practice workshop incorporating my photography, in which I would develop my negatives to A4, scan them in and then print them onto acetate. These would then be available to the participants to layer onto of one another in any order on an over-head projector. Each participant would be given one colour and one drawing style to use to recreate the image they had created from the acetate prints.
Tuesday, 14 May 2013
Digital Editing
 |
| Inverted |
 |
| Gaussian Blur |
 |
| Glamour Glow |
I also edited the photographs with the hand print and with people walking.
Subscribe to:
Comments (Atom)